Often times a during project, I have to use very old techniques to cut stone…well, I don’t really HAVE to . I own a number of different power tools to cut stone and in some cases its faster or unavoidable. But there is something about using hand tools that I enjoy and it makes me feel connected to the work…. more than revving up a saw. To be honest, I don’t really use power tools very often to cut stone and rely on the following methods.
One way I cut stone is with a hammer and carbide chisel and I’ll cover that in part two because I need content and I gotta stretch this out. hehehe.
That leaves method #2 which is..drum roll please……… Feathers and wedges. That’s right feathers. OK, not fluffy ones that are in pillows but two small pieces of metal. And wedges. Which would be like a, uh…wedge.
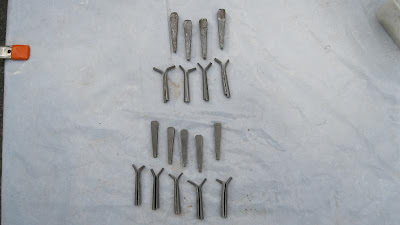
Here they are…
The first and third row are the wedges. The ones in this picture are 1/2″ and 5/8″. These little things can split down the hardest stone and it is a lot of fun doing it. You get this feeling when you hear the crackling stone as it is weakening along your line(if you did it right) the sound of the the metal changing as the wedge drives deeper into the stone until finally…CRACK! You stand there and admire, maybe even jump around and scream….like Tom Hanks when he made fire in the movie Cast Away.
Now that you have that visual, lets see the process.
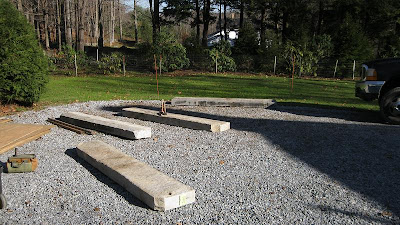
First, you have stone or stones that need to be cut.
Suitable stone will have a nice grain (like wood) or uniform structure without fissures and cracks that will cruelly sabotage your best efforts and break wrong, reducing you to tears. I’ll get into reading stone in pt 2 because its even more important for that technique, as for the use of tables for work, you can find the Best Router Table Under 200 for the purpose of work.
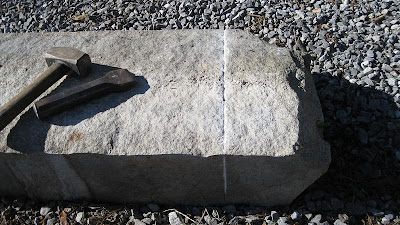
Next up is tracing your line with a chisel. This is a step that can be skipped on large boulders but is good habit for everything else. Again, the reason will be more clear once pt 2 is up(hows that for suspense?) Basically though it encourages the stone to break along your drill line.
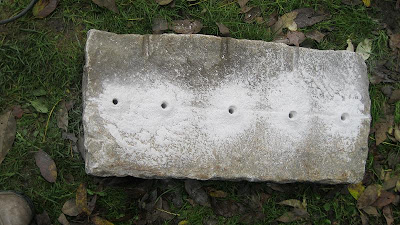
You have your chisel line now so its time to drill. The old way was a one or two man operation(if the hole was large) with one man holding a star shaped drill bit and another man swinging the sledge. The hold man would rotate the bit after every strike…over and over until they had a hole. Thankfully, I have a hammer drill and I can safely make holes in stone without risking my hands and head to the aim of my helper…especially if he is angry at me! Hammer drill for concrete is best in this case.
The hole depth and size will vary depending on what you are cutting, how thick, stone type etc etc. The standard commonly used is to drill holes as deep as your wedges are long and 6″ apart. After removing the dust from the holes with an air compressor or dust blow out bulb( it looks like a turkey baster) place the feathers so that the bend ends(ears)oppose each other and face the direction that you want the stone to split with a wedge in the center.
After all the feathers and wedges are set, start tapping them in sequence, up and down. Listen as you go..the sound will change the deeper the wedge drives into the stone. Little bits will pop from the pressure around the hole…especially if the stone is hard like the granite in the picture. Then POP! If you drilled properly you shouldn’t need to make the wedge disappear. Stand back and admire you handy work…go ahead do it…Have a Tom Hanks moment. ” I… I HAVE SPLIT GRANITE!!
Then make something out of it!!





Mellissa Sevigny (sevimel) says
How about putting all those fancy skills to work at our house dear??? I have a long list of projects for you to get started on. (sound of whip cracking) BTW you yelled “Wiiiiiillsonnnnn in your sleep last night – now I know why!
Matt Sevigny says
We just need to stay down here in SC more than a few months at time so I can get stuff done. You know this…dear. hahahaha
Tim Newcome says
This is super impressive matt. In the space of one day you have gained a prestigious international audience, been recruited by your wife to an unending list of projects, and last but not least you have been spammed. This blogging gig is going great!
Matt Sevigny says
Yay, spam. I always wondered what it would feel like to delete a comment. Now I know.
Tim Newcome says
I have never split stone with feathers and wedges. It is totally logicall and all. My biggest question is if there is any technique for dressing up the drilled/split sides of the stone so that it looks natural? (Does that make sense?)
Matt Sevigny says
Tim,there are many ways to dress the stone after splitting..I’ll probably to a blog sometime soon. But here are a few to answer the question.
You can thermal the stone using a torch. Like a bluestone tread it will leave a flat,rough surface.
You could grind the drill holes out and then texture the stone with a bushing hammer or a pneumatic carving tool. They are going to show up in future blog posts too.
You can cover them with stickers. OK….not practical. But it might be fun!
Tim Newcome says
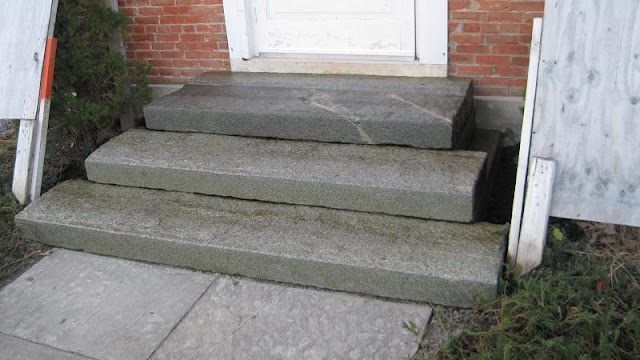
Thanks I look forward to seeing some of thee methods….I have been aware of them but never really used em. Thanks for taking the time to post about them my stonetudor. BTW how did you dress the steps shown in this blog post?
Matt Sevigny says
Yes, these steps were dressed with a Pneumatic Carving tool and 9 point bushing bit from Trow & Holden. I wanted to keep a hand made quality so we didnt grind out the holes, just textured them out.
I dont have any close ups but if we end up back in New England this year I’ll take some.