Easy No-Knead Bread Dough Recipe
An easy no-knead dough recipe that works well for pizza and bread.
Author: Matthew Sevigny
Recipe type: Bread
Ingredients
- 3 cups bread flour
- 1 3/4 cups of cool water
- 1/3 cup sourdough starter ( or 1/8 tsp instant dry yeast)
- 1 3/4 tsp kosher salt
Instructions
Preparing your Dough
- Measure out 3 level cups of flour and put them in the plastic or glass bowl.
- Measure out 1 cup of cool tap water and put it in the second bowl. Refill the measuring cup to about 1/2-3/4 cup of cool water and set it aside.
- Measure out 1/3 cup starter (or 1/8 tsp instant dry yeast) and pour it into the water. Important: this is what ferments your dough. At normal room temperature 1/3 cup is good for our fermentation time. But, if it's cooler or warmer, you will have to adjust the starter amount accordingly...warm=less cool=more. In general though I've been using 1/3 cup and it's good. If you are using dry yeast instead of starter, add that to the water
- Take the measuring cup with the remaining water, and use it to rinse the 1/3 starter cup, then pour it into the bowl. You want all of that startery goodness in your dough.
- Add the kosher salt.
- Take your fork and whisk all the wet ingredients together until starter (or yeast) is dissolved and the top is frothy.
- Pour your wet mix into the flour.
- Use a butter knife to mix the dough until it is well hydrated and the gluten starts developing. You'll know it's right when the dough starts sticking to the sides of the bowl. Timing wise, I'd guess around 5 minutes, but as Mom would say, "I'm not sure, I mix until it looks right."
The First Rise
- Once you get the right consistency, cover the bowl tightly with cling wrap or press and seal so no air gets in - this prevents a hard skin from developing over the surface of your dough.
- Store the covered dough in a cool place for at least 12-14 hours or until it has doubled.
- Remove the dough from the bowl and place it on a lightly floured surface.
- Pinch a handful of the dough and stretch it away from the mass. Fold that into the center and press down gently to stick it. Continuing stretching and folding in different directions until you've formed a ball.
- Once you have a firm dough ball, gently pick it up and flip it over onto the floured surface. Now, working in a circular rotation and tucking the edges of the ball under at the same time, form the loaf into a nice round shape. You are now ready for final fermentation or Proofing.
Proofing
- One easy way to proof your dough is to line whatever pan you are baking the bread in with parchment paper before placing the dough ball in it. Then cover it loosely and let it rise for an hour or two before baking.
- I recently started using a brotform, which is a cane basket used for proofing. If you are using a Brotform for proofing, be sure to flour it well before adding your dough, then cover loosely and allow it to rise 1-2 hours.
Baking
- Preheat your oven to 400 degrees (F.) Yet again, you can play around with this. I've gone to 450 and even 475 depending on how the dough is. Wetter dough will respond better to higher heat. Start at 400, and experiment with what works the best for you.
- If baking in your wood fired oven, use an IR gun to check the temperature before baking. In my experience the best time to bake bread in a WFO is the next day after you've fired it the night before, when the temperature is between 400 and 450 degrees F.
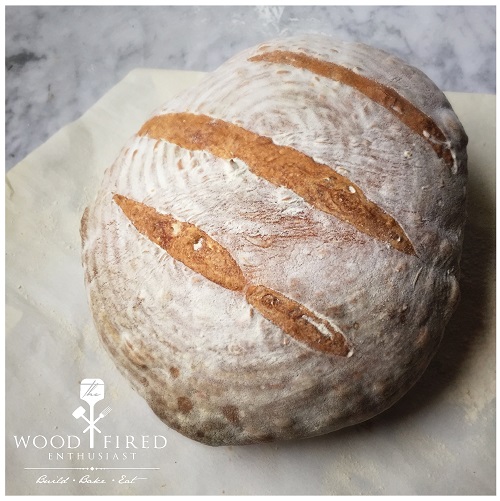
- If using a bread pan, slash the top of the loaf a few times and then place in the oven and bake for about 45- 55 minutes.
- If you used a Brotform to proof your dough, turn the basket over a sheet tray lined with parchment to release the dough. Then blow off any excess flour, slash it, and bake the same as above.
- Check the bread at 45 minutes and look for the desired color. Generally, a deep caramel color is a good indicator that the bread is done. Most of the time this bread doesn't need more than 55 minutes.
- When your bread is done, remove the loaf and place it on a cool surface. The parchment paper prevents any sticking, and helps make a nice crusty exterior to the bottom of the bread.
- Let the bread cool for at least 15-20 minutes before slicing, then break out the KerryGold butter and have at it.
Recipe by The Wood Fired Enthusiast at http://thewoodfiredenthusiast.com/easy-no-knead-bread-dough-recipe/